VNC using Remote Desktop Viewer (Vinagre) – For Ubuntu
This manual is written based on Ubuntu 24.04 LTS
Remote Desktop Connection must be
connected via IIT VPN connection if you are outside of Illinois Tech Network
If you are inside of Illinois Tech Network, you may skip to Step 3.
1.
Visit
https://www.iit.edu/ots/access/vpn-remote-access/debian-based-linux
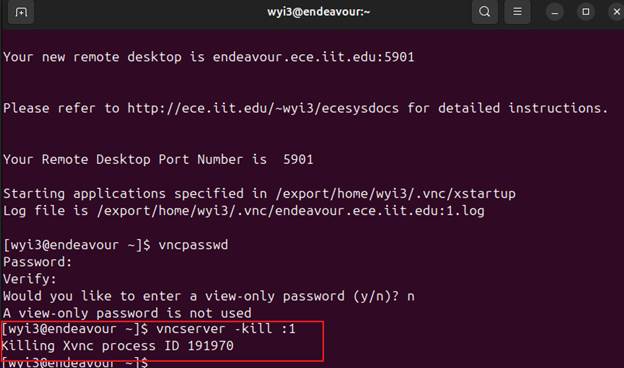
and follow instructions according to your computing environment. Please
contact Support Desk directly at supportdesk@iit.edu for further assistance
2.
In
any case the program alerts that the login does not work, please open up a ticket at OTS SupportDesk by emailing supportdesk@iit.edu. OTS will help your
ID to work for VPN.
3. Open Terminal on your Ubuntu
4. ECE Endeavour server can be connected via SSH using Terminal. Type "ssh yourID@endeavour.ece.iit.edu". If it is the first time connecting to Endeavour, you'll encounter a message about RSA key fingerprint. Type "yes" and press enter, then type in your password.
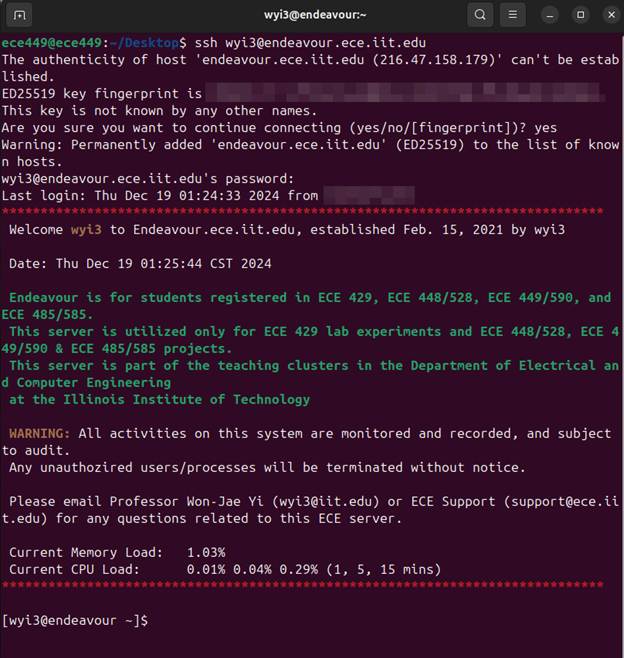
5. If you have logged in successfully, you will be encountering similar screen as the above figure.
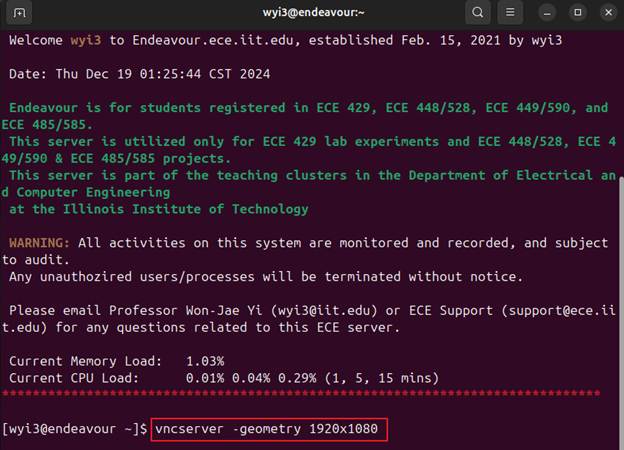
6. In order to start your remote session to Endeavour, you'll need to start VNCserver from your account. With VNCserver, you can choose your desired remote screen resolution. For example, if your desired remote screen resolution is 1920x1080, then type "vncserver -geometry 1920x1080" like the below figure:
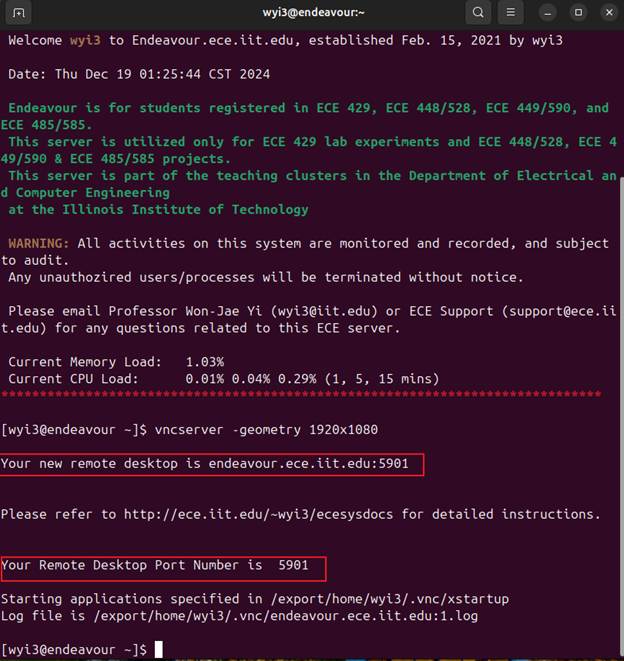
7. Now, Endeavour will generate your virtual remote desktop on the server with a designated port number for your account. Any VNCserver port number for Endeavour will start with 59xx. In the below example, the generated port number is 1, thus your VNCserver port number will be 5901.
8. Lastly, you'll need to set up your VNCserver password. This should be done only once at first time using VNCserver. Type "vncpasswd" and type in your password. This password will be used to connect to your remote session. If you have set your VNCserver password previously, you don't need to do this again.
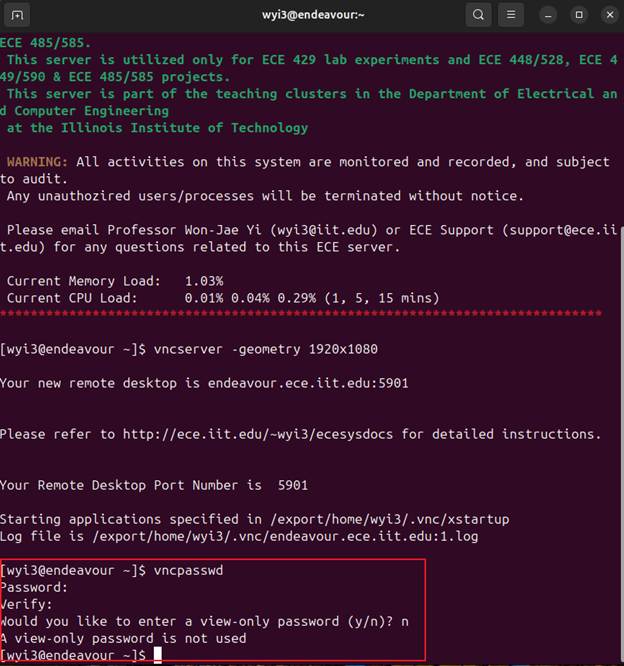
9. Now, your remote desktop session is created on Endeavour. You'll now need to open up this remote session using a remote desktop viewer. In this example, we will use Remote Desktop Viewer (Vinagre) on Ubuntu.
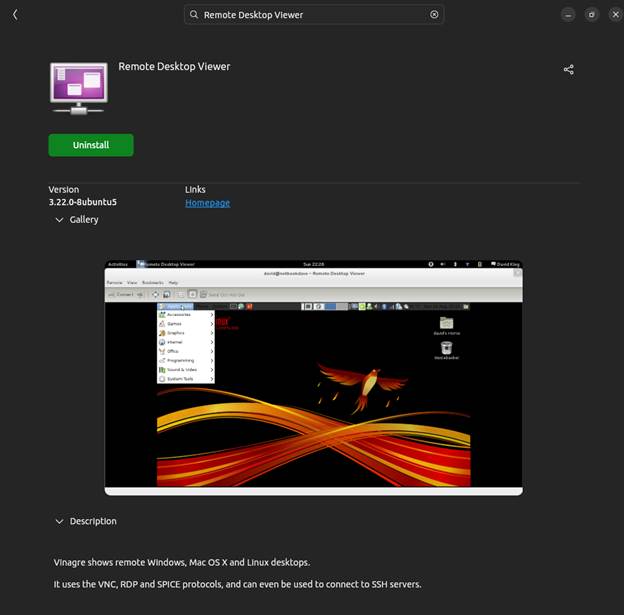
10. Search for either "remote desktop viewer" or "vinagre" like the above figure, and install.
11. Click Install to install this program on your Ubuntu. Once it is completed installation, click on Launch. You'll now see Remote Desktop Viewer opened. Click on Connect and follow the figure below. Make sure the width and height matches your resolution from Procedure 7:
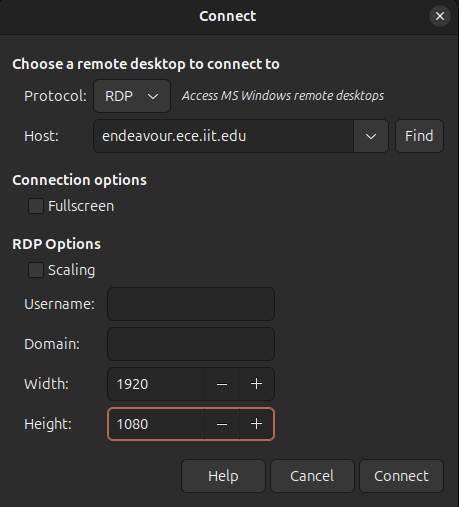
12. Once you click "Connect", you'll see the following pop-up window:
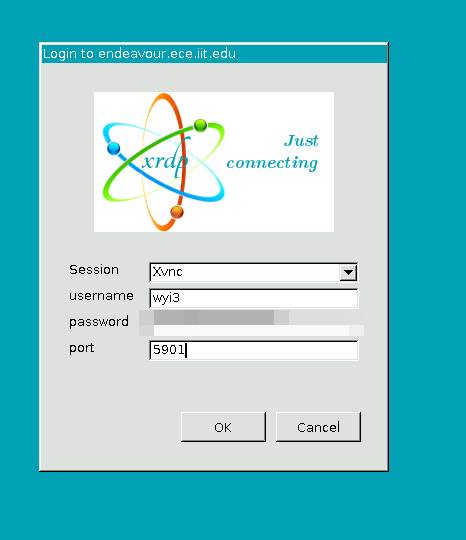
13.Type in the port number generated from Procedure 6. In this example, port number is 5901. Type in the password generated from Procedure 8, and click OK.
14.Once you are successfully logged into the system, you'll see similar window like the following figure:
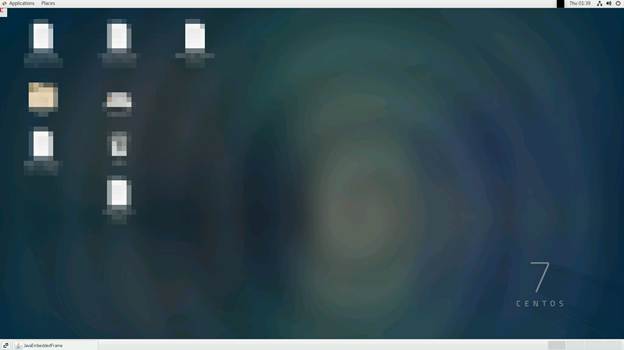
15.You can now use Endeavour using Remote Desktop Viewer (Vinagre).
16.Everytime when you are done with your session, be sure to close your current VNCserver by killing the process from PuTTY, by typing "vncserver -kill :port number". In this example, it would be vncserver -kill :1 like the following figure: