44VNC using Windows App – For MacOS
This manual is written based on Sequoia 15.0
Remote Desktop Connection must be
connected via IIT VPN connection if you are outside of Illinois Tech Network
If you are inside of Illinois Tech Network, skip to Step 5
1.
Visit
https://www.iit.edu/ots/access/vpn-remote-access/cisco-anyconnect-osx
and follow instructions according to your computing environment. Please
contact Support Desk directly at supportdesk@iit.edu for further assistance
2.
Once
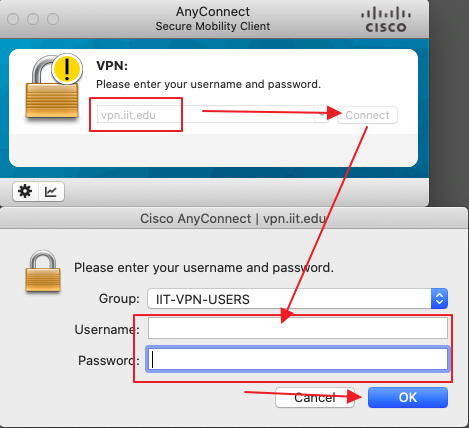
installed, execute Cisco AnyConnect from your computer. In the address field,
enter vpn.iit.edu. When prompts for Username and Password, enter your
IIT Hawk email address (username@hawk.iit.edu) and password. It will perform an
update in the first login process.
3.
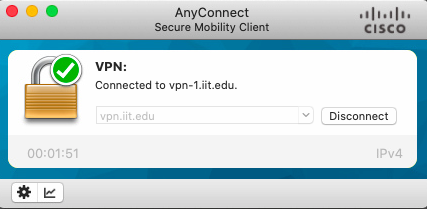
VPN
program will now proceed to Illinois Tech Multi Factor Authentication process.
On your phone, you will receive a notification from Okta app to approve this
request. Click Yes to continue. If you still have trouble connecting to
IIT-VPN, please refer to detailed steps from here (https://www.iit.edu/ots/access/vpn-remote-access/cisco-anyconnect-osx)
and/or contact OTS Support (supportdesk@iit.edu).
4.
In
any case the program alerts that the login does not work, please open up a
ticket at OTS SupportDesk by emailing supportdesk@iit.edu.
OTS will help your ID to work for VPN.
5. Open Terminal on your Mac
6. ECE Endeavour server can be connected via SSH using Terminal. Type "ssh yourID@endeavour.ece.iit.edu". If it is the first time connecting to Endeavour, you'll encounter a message about RSA key fingerprint. Type "yes" and press enter, then type in your password.
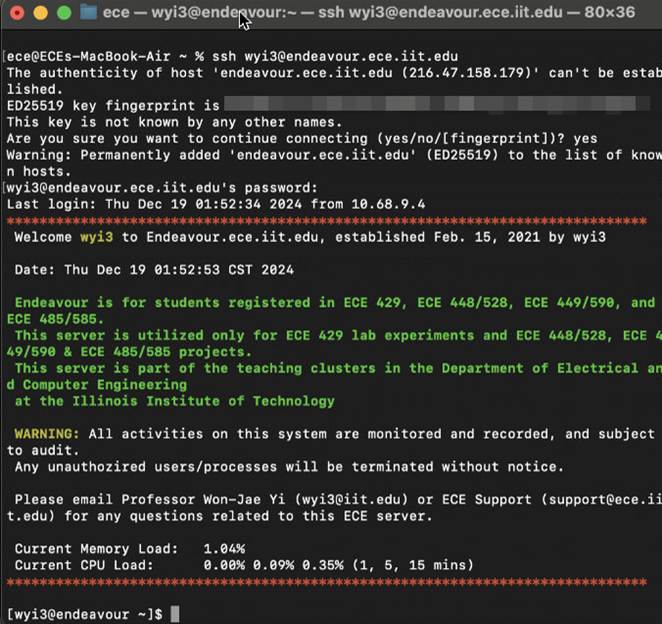
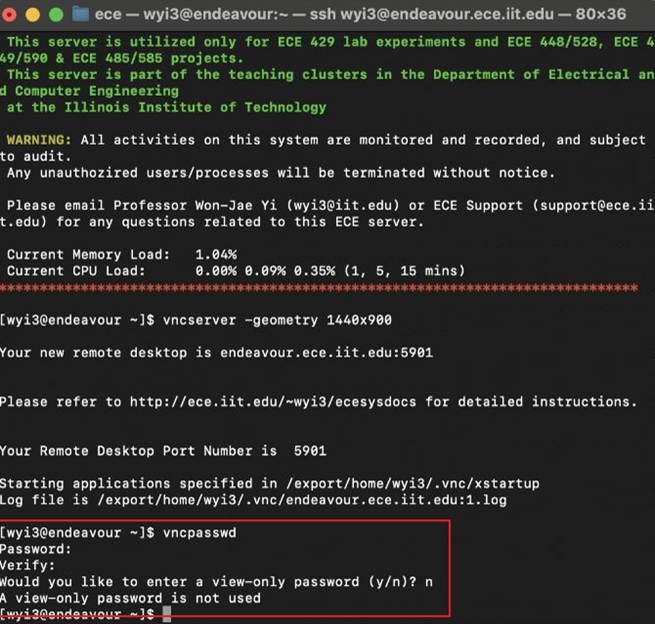
7. Now, use your ID and password to login to Endeavour. If you see similar windows like the above figure, you are successfully logged in.
8. In order to start your remote session to Endeavour, you'll need to start VNCserver from your account. With VNCserver, you can choose your desired remote screen resolution. For example, if your desired remote screen resolution is 1440x900, then type "vncserver -geometry 1440x900" like the below figure:
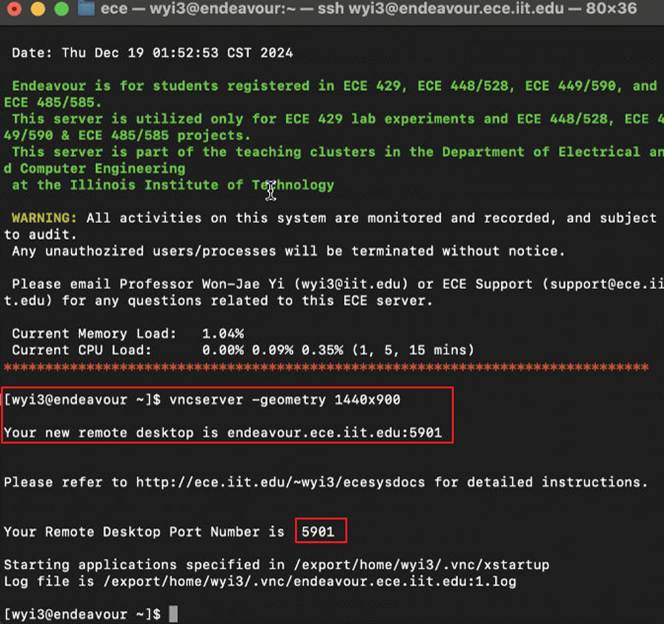
9. Now, Endeavour will generate your virtual remote desktop on the server with a designated port number for your account. Any VNCserver port number for Saturn, Uranus and Endeavour will start with 59xx. In the above example, the generated port number is 1, thus your VNCserver port number will be 5901.
10. Lastly, you'll need to set up your VNCserver password. This should be done only once at first time using VNCserver. Type "vncpasswd" and type in your password. This password will be used to connect to your remote session. If you have set your VNCserver password previously, you don't need to do this again.
11. Now, your remote desktop session is created on Endeavour. You'll need to install Windows App (previously Remote Desktop). Go to App Store, and search for Windows App and install:
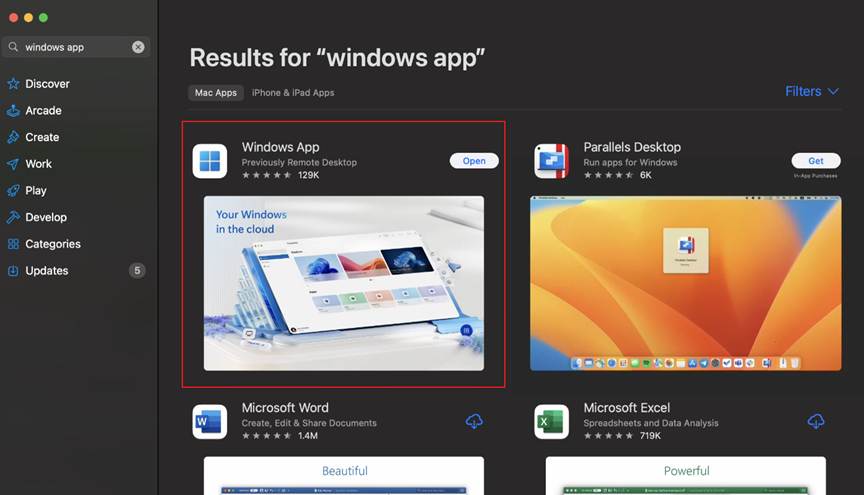
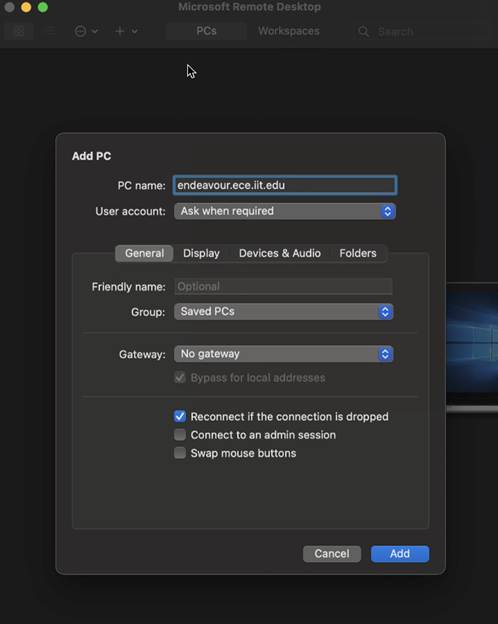
12. Open Windows App, and you'll see the following window. Click on "Add PC"
13. Add a PC with the PC name:
endeavour.ece.iit.edu.
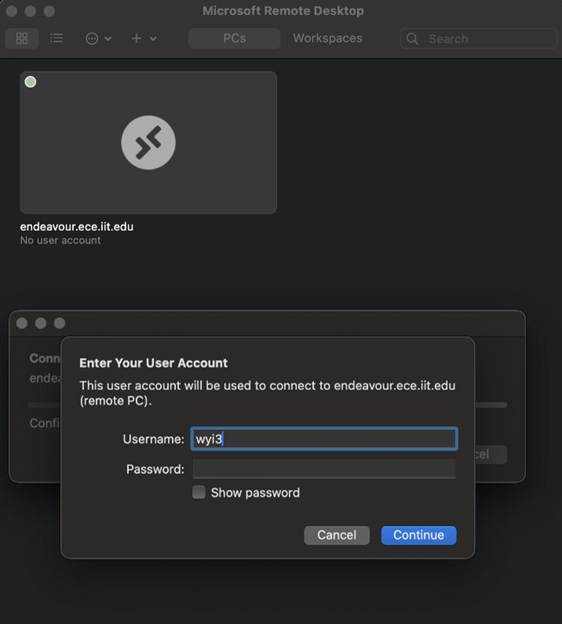
14. Now, you'll see endeavour.ece.iit.edu added to the list. Double Click on the server domain name. Click continue if you encounter a message like the following figure. You do not need to put your password during this stage but just your ID, and click Continue:
15. You may encounter the following window. Click on
OK.
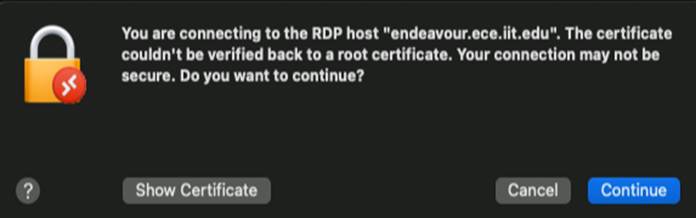
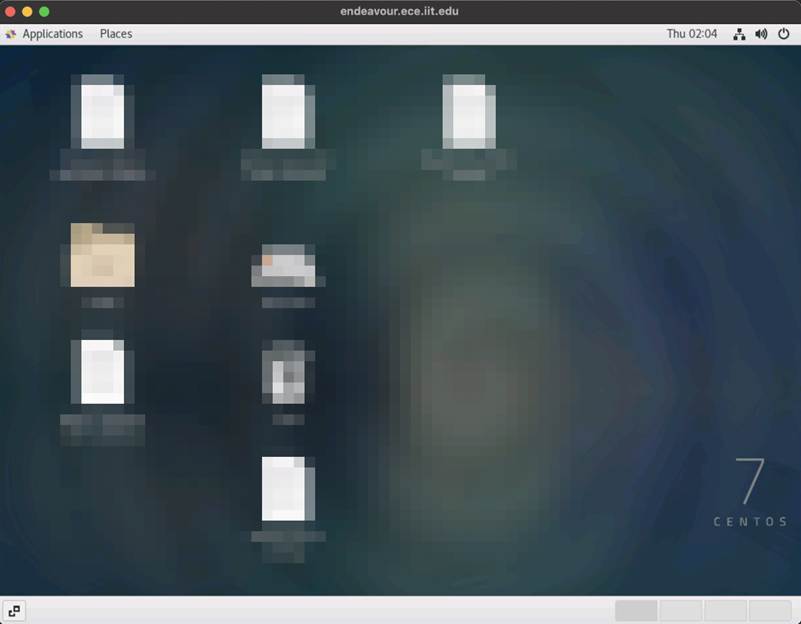
16. Once you are successfully logged in, you will see
similar window as the following:
17. Everytime when you are done with your session, be
sure to close your current VNCserver by killing the process from PuTTY, by
typing "vncserver -kill :port number". In this example,
it would be vncserver -kill :1
